
To change a breaker safely, turn off the main power switch at the top of your electrical panel and verify zero voltage using a non-contact voltage tester. Remove the panel cover, pull the faulty breaker outward from the bus bar, disconnect the terminal wire, snap the new matching breaker into place, reconnect the wire, and restore main power.
Few things are more frustrating on a sweltering Southeast Texas afternoon than walking over to your thermostat, hearing a sharp click from the utility room, and realizing your air conditioner has shut down completely. When an HVAC system repeatedly loses power, many homeowners immediately head to their electrical panel wondering how to change a breaker themselves to get the cool air flowing again.
While swapping out a worn circuit breaker might look straightforward on paper, electrical panels carry lethal voltage—and a tripping HVAC breaker is often a symptom of a deeper mechanical issue rather than a bad switch. At Valderrama A/C & Refrigeration, we help local homeowners troubleshoot power interruptions safely and reliably. Here is everything you need to know about replacing a circuit breaker, diagnosing why your HVAC unit is tripping power, and knowing when to step back and call a professional.
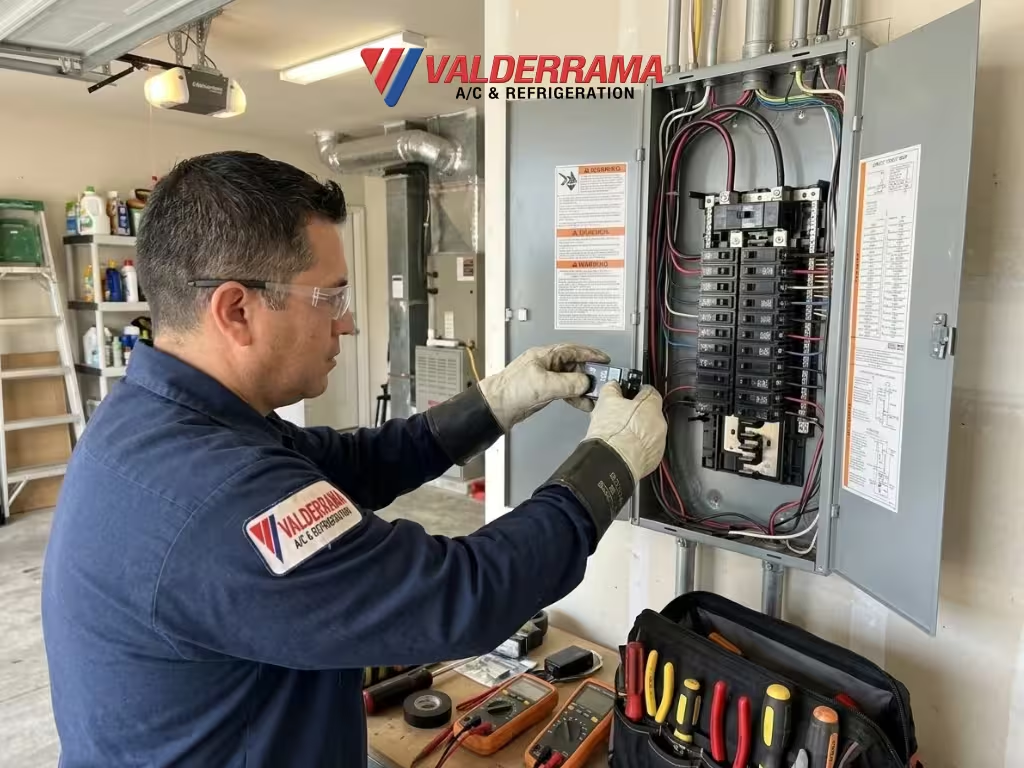
Common Causes of a Tripping or Failed Circuit Breaker
Before replacing any hardware inside your service panel, it helps to understand why a breaker fails or trips in the first place. Circuit breakers are safety devices designed to cut electrical flow before wires overheat and cause a fire. When your heating or cooling breaker keeps shutting off, one of the following issues is usually responsible:
- Overloaded Circuits: High-amperage appliances like central air conditioners require dedicated double-pole breakers (typically 240 volts). If additional heavy loads share the circuit or if the HVAC equipment pulls excessive current, the breaker trips to protect the wiring.
- Hard-Starting AC Compressor: As an outdoor air conditioning compressor ages, it requires a massive surge of electricity to start up. This high inrush current frequently trips older or weakened breakers.
- Dirty Condenser Coils or Clogged Filters: When airflow is restricted or outdoor coils are coated in grime, your HVAC system runs hotter and longer, drawing more amperage than the breaker is rated to handle.
- Short Circuits or Ground Faults: Frayed insulation, loose wire connections inside the outdoor disconnect box, or a shorted fan motor will cause an instant, violent trip the moment power is restored.
- Worn-Out Breaker Mechanism: Breakers contain internal thermal strips and magnetic coils that degrade over time—especially if a breaker has tripped dozens of times over several summers.
Symptoms of a Bad Circuit Breaker
How do you know if the breaker itself has failed versus your HVAC unit causing an overload? Look for these unmistakable warning signs:
- Physical Heat or Burning Odors: A breaker that feels hot to the touch or emits a faint fishy or burning plastic smell is failing internally and poses an immediate fire hazard.
- Visible Scorch Marks or Melted Plastic: Discoloration around the switch or on the panel bus bar indicates dangerous electrical arcing.
- Loose or Mushy Switch Handle: A healthy breaker snaps firmly into the “ON” or “OFF” position. If the toggle feels spongy, loose, or refuses to stay latched even with the HVAC unit turned off at the thermostat, the internal spring has failed.
- Immediate Tripping Under Zero Load: If you turn off your AC at the thermostat and the breaker still trips instantly when reset, the fault lies in the breaker or the wiring—not the air conditioner.
- Buzzing or Crackling Sounds: Audible humming or popping coming from the service panel signals a loose connection or failing breaker contact.
DIY Checks Before Changing a Breaker
If you are comfortable inspecting your electrical setup, perform these safe preliminary checks before opening the panel cover or buying replacement parts:
- Turn Off the Thermostat First: Switch your thermostat system mode to “OFF” before touching the breaker panel. This prevents your air conditioner from kicking on immediately while you test the circuit.
- Perform a Proper Breaker Reset: A tripped breaker usually rests in a middle position. Push the handle firmly all the way to the “OFF” position until it clicks, then flip it back to “ON.”
- Check Your Air Filter and Outdoor Unit: Inspect your indoor return filter for heavy dust buildup and verify that leaves, grass clippings, or debris aren’t choking your outdoor condenser unit.
- Inspect the Outdoor Disconnect Box: Near your outdoor condenser is a small metal pull-out disconnect box. Visually check the exterior for water intrusion, rust, or melted components—never pull the disconnect block while the system is actively running.
- Verify Exact Breaker Specifications: If the breaker truly needs replacement, check the amperage rating printed on the switch handle (e.g., 30A, 40A, or 50A), the pole configuration (single-pole 120V vs. double-pole 240V), and the exact panel brand. Breakers are not universally interchangeable across different panel manufacturers.
Step-by-Step Overview: How to Change a Breaker
Safety Warning: Even when the main breaker is turned off, the heavy service entrance lugs at the top of the panel remain energized with live utility power. If you have any doubt about working near live bus bars, stop immediately and contact a licensed professional.
- Shut Down All Branch Breakers and Main Power: Turn off individual branch breakers one by one, then flip the main breaker switch at the top of the panel to “OFF.”
- Remove the Dead-Front Panel Cover: Use a screwdriver to remove the cover screws while supporting the metal cover with your free hand so it does not slip into the wiring.
- Test for Zero Voltage: Use a calibrated non-contact voltage tester or multimeter on the breaker terminals and bus bar to confirm no power is flowing to the working area.
- Disconnect the Wires: Loosen the terminal screw(s) on the faulty breaker using an insulated screwdriver and gently pull the copper wire(s) free.
- Remove the Old Breaker: Grip the outer edge of the breaker and rock it outward away from the center bus bar until it unclips from the mounting rail.
- Install the New Matching Breaker: Ensure the new breaker switch is in the “OFF” position. Hook the back clip onto the mounting rail and press firmly inward until it snaps squarely onto the bus bar.
- Reconnect Wires and Restore Power: Insert the copper wire(s) fully into the new terminal lugs, tighten securely, reinstall the panel cover, turn on the main breaker, and flip on your branch circuits one at a time.
Beaumont’s Weather and Electrical System Challenges
Beaumont’s heat and humidity place extreme strain on HVAC systems and the electrical circuits powering them. Throughout long Gulf Coast summers, afternoon temperatures regularly climb into the mid-90s with oppressive humidity levels, forcing air conditioners to run nearly continuously for months at a time.
Sustained high-amperage draw generates significant heat inside residential breaker panels—especially when panels are mounted in unconditioned garages or exterior walls exposed to direct Texas sun. Combined with frequent Gulf Coast thunderstorms, lightning-induced power surges, and coastal moisture that accelerates corrosion on outdoor disconnect terminals, local HVAC electrical components endure far greater stress than systems in milder climates. A breaker that holds up fine in April can easily overheat and fail by July.
When to Call a Professional Technician
Changing a breaker only fixes the symptom if your HVAC equipment is pulling excessive current. If you install a brand-new breaker and it trips again within days—or immediately upon startup—continuing to reset it can burn out your compressor windings or damage your home’s wiring.
You should always bring in a qualified specialist when:
- You see scorch marks, melted insulation, or corrosion inside the panel.
- Your panel is an outdated brand known for safety defects (such as Federal Pacific or Zinsco).
- The new breaker continues tripping whenever the AC compressor or electric heat strips engage.
- You are unsure how to size wire gauges or match amperage ratings safely.
At Valderrama A/C & Refrigeration, our technicians diagnose both the electrical supply and the HVAC equipment together, ensuring your system runs safely without overloading your home’s electrical panel.
5 Signs You Need Electrical Service
If your heating or cooling system is experiencing power interruptions, watch for these 5 clear indicators that your home needs professional Electrical Service:
- Breaker Trips Repeatedly When AC Starts: A breaker that trips the second your outdoor unit kicks on points to a locked compressor rotor, failing capacitor, or shorted wiring.
- Flickering Lights When HVAC Cycles On: Noticeable dimming across indoor lights during system startup signals voltage drops, loose neutral connections, or an undersized electrical circuit.
- Burning Smells Near the Panel or Thermostat: Any acrid, metallic, or melted plastic odor indicates overheating wires or failing terminal lugs that require immediate shutdown and repair.
- Warm or Buzzing Breaker Panel: Electrical panels should remain cool and silent; warmth or humming signals resistance buildup and impending component failure.
- Corroded or Damaged Outdoor Disconnect: Rust, burnt wires, or loose fuses inside your outdoor AC disconnect box disrupt voltage delivery and create severe shock hazards.
Don’t gamble with high-voltage wiring or risk burning out an expensive compressor. Explore our local Beaumont HVAC and electrical service coverage to get fast, dependable diagnostics from experienced technicians.
Prevention Tips to Protect Your HVAC Breakers
A few proactive habits can dramatically reduce electrical strain and prevent unexpected breaker trips during peak weather:
- Schedule Bi-Annual HVAC Tune-Ups: Having Valderrama A/C & Refrigeration inspect electrical contactors, test capacitor microfarad ratings, and measure compressor amp draw catches high-resistance parts before they trip breakers.
- Keep Outdoor Coils Clean: Hose off dirt and grass clippings from your outdoor condenser fins each spring so heat transfers efficiently and compressor amp draw stays low.
- Change Air Filters Every 30–60 Days: Restricted airflow forces blower motors and compressors to work harder and pull higher electrical current.
- Install a Whole-Home Surge Protector: Protect sensitive HVAC control boards and compressor electronics from Southeast Texas thunderstorm surges.
- Never Upsize a Breaker: Never replace a 30-amp breaker with a 40-amp breaker to stop nuisance tripping—doing so allows wires to overheat past their safe limit and creates a serious fire risk.
Frequently Asked Questions
Can I replace a circuit breaker myself without turning off the main breaker?
No. You should never attempt to remove or install a breaker while the bus bar is energized. Turning off the main breaker eliminates voltage on the bus bars, though extreme caution is still required because the main service lugs remain live.
Why does my AC breaker trip only on the hottest days?
Extreme outdoor heat raises refrigerant head pressure inside your outdoor condenser, forcing the compressor to work harder and draw more amperage. Combined with high ambient heat warming the breaker panel, this extra load pushes weakened breakers past their thermal trip threshold.
How much does it cost to have a professional replace a breaker?
Replacing a standard single- or double-pole breaker typically costs between $150 and $350 depending on the breaker type, amperage rating, and whether diagnostic testing is needed to resolve underlying HVAC electrical faults.
Can I use a different brand of breaker if it looks like it fits?
No. Even if a breaker physically snaps onto the rail, mismatched brands often fail to make proper contact with the bus bar, leading to electrical arcing, overheating, and voided panel warranties. Always use UL-listed breakers approved for your exact panel model.
What if my new breaker keeps tripping after I replace it?
If a brand-new breaker trips immediately or shortly after installation, the breaker wasn’t the problem. You likely have a shorted wire, failing compressor, bad capacitor, or grounded fan motor that requires professional HVAC electrical diagnostics.
Ready to optimize your indoor climate and lower your energy costs?
Schedule Your Precision HVAC System Inspection Now!
Call our team today at (281) 974 – 4599 to speak with an experienced specialist and confirm your service visit.