
To replace a circuit breaker, switch off the main breaker, verify zero voltage with a non-contact tester, remove the panel cover, disconnect the hot wire, and snap out the faulty breaker. Install an exact brand- and amperage-matched replacement, reconnect the wire, and restore power. Because live bus bars remain energized, hire a licensed professional if unsure.
Nothing ruins a peaceful afternoon faster than walking into a warm, silent house and realizing your air conditioner has shut down—again. You walk out to the garage, open the electrical panel, and find the double-pole HVAC breaker tripped. You flip it back on, only for it to snap off seconds later or feel unusually warm to the touch. At that point, many homeowners start researching how to replace a circuit breaker to restore power quickly and get their cooling back online.
At Valderrama A/C & Refrigeration, we see firsthand how closely your home’s electrical health and your HVAC performance are connected. While swapping a breaker looks straightforward on paper, working inside a main service panel carries serious electrocution and fire hazards. Below, we break down what causes breakers to fail, safe diagnostic checks you can perform, the exact replacement steps, and when to leave the job to our licensed technicians in Houston, TX.
Common Causes of Circuit Breaker Failure
Circuit breakers are mechanical safety switches engineered to trip when electrical current exceeds safe limits. Over years of service, however, internal springs, thermal strips, and magnetic trip mechanisms wear out. Understanding why a breaker fails helps ensure you fix the root problem rather than just masking a dangerous electrical fault.
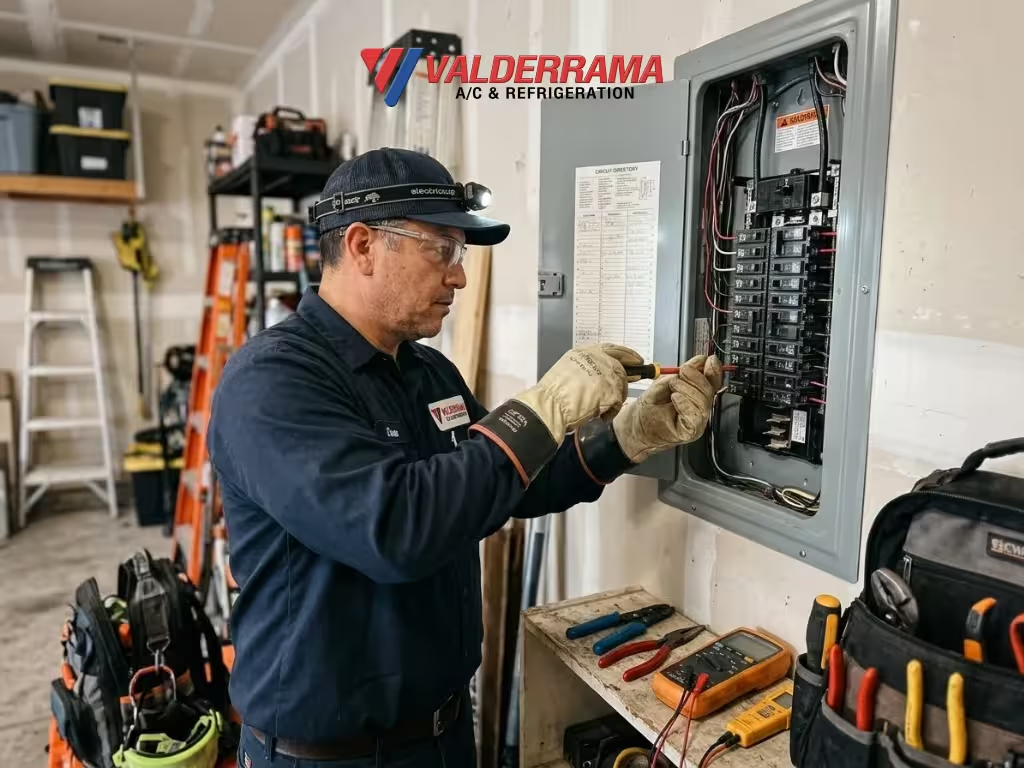
1. Chronic Electrical Overloads
When appliances draw more amperage than a circuit is rated to handle, the breaker trips to prevent wiring inside your walls from overheating. Running space heaters, hair dryers, or high-draw garage tools on shared circuits accelerates internal wear on the breaker’s thermal strip.
2. Struggling HVAC Compressors and Motors
Your central air conditioner or heat pump is typically the largest electrical load in your home. A failing compressor, worn capacitor, or dirty condenser coil forces the unit to pull excessive startup amperage (locked-rotor amps), repeatedly tripping the dedicated HVAC breaker until its internal contacts degrade.
3. Short Circuits and Ground Faults
Damaged wire insulation, loose terminal screws, or moisture intrusion inside an outdoor disconnect box can allow a hot wire to touch a neutral wire or grounded metal. This causes an instantaneous surge of current that violently trips the breaker and can arc-damage its internal contacts.
4. Age and Thermal Fatigue
Most residential circuit breakers last between 15 and 30 years. Years of heating up under heavy summer electrical loads and cooling down at night gradually weaken the spring tension inside the breaker, leading to nuisance tripping even under normal loads.
Symptoms of a Failing Circuit Breaker
Before assuming you need a replacement, look for clear physical and operational signs that the breaker itself—rather than a connected appliance—has failed:
- The Breaker Will Not Reset: When you push the toggle firmly to the OFF position and then back to ON, it immediately snaps back to the tripped center position or feels loose and mushy with no crisp click.
- Burning Odors or Scorch Marks: A distinct acrid, fishy, or burnt plastic smell coming from the electrical panel, or visible discoloration around the breaker casing, indicates dangerous overheating or arcing.
- Excessive Heat on the Breaker Face: While breakers running heavy HVAC loads can feel mildly warm, a breaker that is hot to the touch signals failing internal resistance or a loose bus bar connection.
- Frequent Nuisance Tripping: The circuit trips repeatedly even when high-wattage appliances are unplugged or turned off.
- Visible Physical Damage: Cracks in the plastic housing, melted insulation on the attached wire, or corrosion on the breaker terminals require immediate replacement.
Safe DIY Checks Before Opening the Panel
Before deciding whether to replace a breaker, perform these safe external checks without removing the metal dead-front panel cover:
- Unplug or Turn Off Connected Loads: Switch off your thermostat and unplug appliances on the affected circuit. Reset the breaker by pushing it all the way to OFF until it clicks, then firmly to ON.
- Inspect the Outdoor AC Disconnect: If your air conditioner breaker tripped, check the disconnect box near your outdoor condenser for signs of tripped fuses, water intrusion, or pest damage.
- Check Your Air Filter and Condenser Coil: Restricted airflow makes your HVAC system draw higher amperage. A severely clogged filter or blocked outdoor coil can push an aging breaker past its trip threshold.
- Verify Panel Compatibility: Check the manufacturer label inside your panel door (such as Square D, Eaton, Siemens, or GE). Never attempt to force a different brand of breaker into your panel, even if it looks similar.
Step-by-Step Overview: How to Replace a Circuit Breaker
Safety Warning: Even when the main breaker at the top of your panel is switched OFF, the heavy service entrance cables entering the main lugs remain fully energized with lethal utility voltage. Never work inside an electrical panel with wet hands, stand on damp concrete, or bypass safety gear.
Step 1: Gather the Exact Replacement and Tools
Purchase a replacement breaker that matches your panel brand, physical series (e.g., QO, Homeline, BR), pole configuration (single-pole 120V or double-pole 240V), and exact amperage rating. Never install a higher-amperage breaker to stop nuisance tripping—doing so allows wires to overheat and start an electrical fire. You will also need an insulated screwdriver, a non-contact voltage tester, and a flashlight.
Step 2: Shut Off the Main Power
Turn off all individual branch breakers first, then switch the main breaker at the top of the panel to the OFF position. Confirm that lights and appliances throughout the home have lost power.
Step 3: Remove the Panel Cover Safely
Use your screwdriver to remove the screws securing the metal dead-front cover. Support the cover with one hand as you remove the final screw so it does not slip and contact internal components.
Step 4: Test for Zero Voltage
Use a verified non-contact voltage tester along the breaker terminals and bus bar area to confirm power is completely shut off. Do not touch the main service lugs at the top of the panel.
Step 5: Disconnect and Remove the Old Breaker
Loosen the terminal screw holding the black (or red) insulated hot wire and pull the wire clear. Grasp the faulty breaker firmly and pivot it outward from the center bus bar to unclip it from the mounting rail.
Step 6: Install the New Breaker and Reconnect Wiring
Verify the new breaker toggle is in the OFF position. Hook the rear clip onto the mounting rail and press firmly toward the center until it snaps securely onto the bus bar. Insert the stripped copper wire cleanly under the terminal lug—making sure no wire insulation is pinched—and tighten the screw securely.
Step 7: Reinstall the Cover and Restore Power
Replace the metal dead-front cover and secure all screws. Switch the main breaker back to ON, then turn on individual branch breakers one at a time.
Houston’s Heat, Humidity, and Electrical Panel Strain
Houston’s heat and humidity place extreme strain on AC systems—and by extension, your home’s electrical panel. During relentless Gulf Coast summers when outdoor heat indices exceed 100°F and humidity stays above 70%, central air conditioners run for 12 to 16 hours a day.
That prolonged, high-amperage demand generates sustained heat inside garage and exterior electrical panels, which are already baking in 95°F+ ambient temperatures. Over time, thermal expansion loosens terminal screws, corrodes copper connections in humid air, and weakens dedicated double-pole HVAC breakers. In older Houston homes, panels originally sized for smaller cooling units often struggle under modern high-capacity systems, making thorough electrical inspections essential before peak summer hits.
When to Call a Professional Electrician
While homeowners with strong electrical experience may handle a simple single-pole swap, certain conditions require immediate professional intervention:
- You see scorch marks, melted wire insulation, or pitting on the panel’s metal bus bar.
- Your home has an outdated or recalled panel brand (such as Federal Pacific Stab-Lok or Zinsco).
- The newly installed breaker trips immediately upon restoring power.
- Your air conditioner’s 240V double-pole breaker keeps tripping, indicating a potential compressor, capacitor, or wiring fault.
- You feel uncomfortable working near live service entrance lugs.
5 Signs You Need Professional Electrical Service
If your electrical system is showing any of the warning signs below, the licensed technicians at Valderrama A/C & Refrigeration are ready to diagnose and resolve the issue safely:
- Flickering or Dimming Lights When the AC Starts: Heavy voltage drops when your air conditioner kicks on signal loose panel connections, an undersized service panel, or a failing hard-start component.
- Warm, Buzzing, or Crackling Electrical Panels: Audible humming or heat radiating from your breaker box indicates arcing connections that pose an immediate fire risk.
- Repeatedly Tripping Double-Pole HVAC Breakers: Persistent trips on dedicated 240V circuits point to grounded compressor windings, shorted control wiring, or a failing breaker.
- Outdated Fuse Boxes or Undersized 100-Amp Panels: Older electrical panels lack the capacity and modern safety protections needed to support today’s HVAC systems and household electronics.
- Scorched Outlets or Non-Functional Outdoor Disconnects: Damaged disconnect switches or corroded wiring near your exterior AC condenser require code-compliant repair before operating your system.
Don’t gamble with live panel hazards or risk damaging expensive cooling equipment. Explore our professional Houston electrical services to schedule a comprehensive safety inspection and panel repair today.
Prevention Tips to Extend Breaker Lifespan
Routine maintenance keeps both your electrical panel and HVAC equipment running safely for decades:
- Schedule Annual Electrical & HVAC Tune-Ups: Having technicians inspect terminal tightness, measure compressor amp draw, and clean coils prevents excessive electrical load.
- Keep Your Panel Area Clear and Dry: Maintain at least 36 inches of clear workspace in front of your electrical panel and seal any exterior gaps where humid Houston air or moisture can enter.
- Use Dedicated Circuits for Major Appliances: Never run space heaters, window units, or heavy power tools on shared household lighting circuits.
- Install Whole-Home Surge Protection: Gulf Coast thunderstorms bring frequent lightning and utility grid fluctuations that damage sensitive HVAC control boards and weaken breakers.
Frequently Asked Questions
How much does it cost to have a professional replace a circuit breaker?
Professional circuit breaker replacement typically ranges from $150 to $350, depending on whether you need a standard single-pole breaker, a 240V double-pole HVAC breaker, or a specialty GFCI/AFCI breaker, plus diagnostic testing of the circuit.
Can I replace a 15-amp breaker with a 20-amp breaker to stop it from tripping?
No. Breaker amperage is matched to the thickness (gauge) of the copper wiring inside your walls. Installing a 20-amp breaker on 14-gauge wire allows the wire to overheat before the breaker trips, creating a severe fire hazard.
Why does my AC circuit breaker keep tripping in the summer?
In hot weather, dirty condenser coils, low refrigerant, a failing run capacitor, or a worn compressor force your air conditioner to draw more electrical current than normal, tripping the breaker to protect the system.
How long does it take to replace a circuit breaker?
Once the root cause of the trip is diagnosed, a licensed technician can typically complete a standard circuit breaker replacement and voltage verification in 30 to 60 minutes.
Is it safe to replace a circuit breaker without turning off the main breaker?
No. Removing or installing a breaker while the bus bars are energized exposes you to live 120V/240V current and arc-flash hazards. Always shut off the main breaker and verify zero voltage before working inside the panel.
Ready to optimize your indoor climate and lower your energy costs?
Schedule Your Precision HVAC System Inspection Now!
Call our team today at (281) 974 – 4599 to speak with an experienced specialist and confirm your service visit.